
You’ve just noticed bubbles and peeling on a freshly painted wall and you’re wondering what went wrong and how to fix it before it spreads. Paint failure like bubbling and peeling is common, but the causes and remedies vary, from simple surface mistakes to serious moisture or structural issues.
Paint bubbles and peels happen when the paint loses adhesion or is forced away from the substrate, most often because of moisture, poor surface preparation, incompatible materials, or application errors.
This guide walks you through the common causes, how to diagnose the root problem, preventive steps before painting, practical repair methods, special situations, and cost and timeframe expectations so you can make the right fix and avoid repeating the same mistake.
Common Causes Of Paint Bubbling And Peeling
Moisture Intrusion And Water Damage
Moisture is the single biggest culprit behind bubbles and peeling. Water vapor that moves through walls from the interior or liquid water from leaks can break the bond between paint and substrate. You may see blistering where water has become trapped beneath the paint film, and over time those blisters will pop and peel away. Exterior leaks, plumbing failures, rising damp, or condensation in poorly ventilated spaces are all typical sources.
When paint fails because of moisture, the damage often returns until the moisture source is fixed. People sometimes repaint over a damp surface, which only delays and magnifies the problem: fresh paint seals moisture in and traps it under the film.
Poor Surface Preparation And Contamination
If the surface wasn’t properly cleaned, degreased, and sanded, the paint won’t form a durable bond. Common contaminants include dirt, grease, wallpaper adhesive, old chalky paint, and dust. Painting over old flaky paint or over glossy finishes without proper sanding or priming leads to adhesion failure and peeling.
Even a seemingly clean wall can harbor contaminants. For example, kitchens and garages accumulate oily films that need solvent cleaning. Skipping primer on porous or patched surfaces also creates weak spots where peeling begins.
Incompatible Paints, Primers, Or Substrates
Using the wrong paint system matters. If latex paint is applied over an alkyd (oil-based) paint without deglossing and priming, the layers may not adhere. Likewise, some masonry paints won’t bond to certain stucco or concrete finishes without a specific primer. Adhesion problems also occur when you try to topcoat a bonded elastomeric system with a noncompatible acrylic.
Manufacturers publish compatibility guidelines, and deviating from them increases the risk of failure. When changing paint types, a proper primer is often the bridge that prevents peeling.
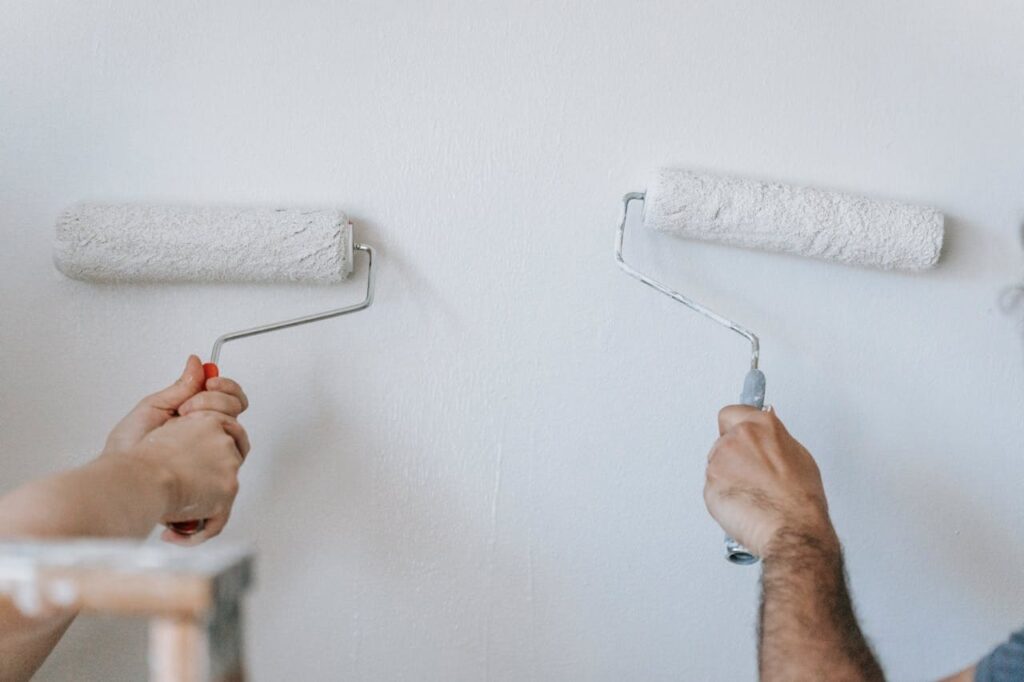
Application Errors: Thickness, Temperature, And Drying
Applying paint too thickly, working in very cold or hot temperatures, or not allowing adequate drying time between coats can trap solvents and moisture, leading to bubbling. Paint applied in direct sun can skin over too fast on the surface while solvents remain underneath, creating blisters.
Also, spraying without correct overlap, rolling with too much pressure, or re-coating before the first coat cures will create weak, stressed paint films prone to blistering.
Structural And Building Movement Issues
Walls move. Thermal expansion and contraction, settlement, or vibration can crack paint and cause it to peel, especially where rigid coatings are used on flexible substrates. Hairline cracks in plaster or drywall joints that weren’t properly taped and mudded will propagate through paint layers.
Repeated movement at seams, around windows, and at transitions between materials is a frequent place to find peeling paint.
Environmental And Seasonal Factors
High humidity, freeze-thaw cycles, and strong sunlight degrade paint differently. In coastal or very humid climates, salt and moisture accelerate paint failure on exterior surfaces. In climates with harsh winters, moisture entering masonry and freezing can lift paint away.
Seasonal timing matters: painting during a rainy, humid period or when nights drop below the recommended temperature will increase the chance of bubbling and peeling.
How To Diagnose The Root Cause
Visual Clues Patterns Locations And Timing
Start by looking closely at where bubbles and peeling occur. Horizontal streaks under a window usually signal a leak at the sill. Peeling at the bottom of an exterior wall often points to rising damp or poor flashing. If only the topcoat is failing but primer and substrate seem sound when you scrape, compatibility or application errors are likely.
Timing also offers clues. If paint bubbles after a storm, suspect water intrusion: if it fails soon after repainting, preparation or application problems are more probable.
Simple Tests Moisture Meter Tap Adherence Check And Scrape Test
Use a moisture meter to check for elevated moisture in walls, readings above normal levels indicate a moisture problem. You can do quick adhesion checks by tapping or using a putty knife: where paint scrapes off easily in large sheets it didn’t adhere properly to the substrate. A small scrape test helps differentiate between surface-only failure and deeper substrate breakdown.
Other quick methods include checking for efflorescence (white powder on masonry) which signals salt-laden moisture pushing through the wall.
When To Call A Professional Plumbing Structural Or Mold
If you find consistently high moisture readings, visible rot, or suspect hidden leaks, call a plumber or a building envelope specialist. For mold growth, which often accompanies chronic damp, consult professionals who can test and remediate according to public health guidelines. Structural movement or major cracks require an engineer or qualified contractor to evaluate and recommend repairs.
Reliable sources like the EPA provide guidance on mold assessment and remediation when indoor air quality is a concern: https://www.epa.gov/mold. For complex roofing or flashing leaks, you’ll want a licensed roofer or building contractor to prevent repeat failures.
Preventive Measures Before Painting
Thorough Surface Preparation Cleaning Repairing And Sanding
You need a clean, dry, and sound surface before you paint. Remove loose or peeling paint with scrapers and sanding, and use a wire brush on masonry where necessary. Clean grease and dirt with a detergent solution or trisodium phosphate (TSP) substitute, and rinse thoroughly.
Repair holes and cracks with appropriate patching compounds. For drywall, tape and finish joints correctly: for plaster, use compatible patching materials. Always allow repairs to fully cure and sand smooth before priming.
Choosing The Right Primer And Paint System
Match primer and paint to the substrate and the job. Use a high-adhesion primer on difficult surfaces and a stain-blocking primer where tannin bleed or water stains exist. For exterior masonry, choose breathable masonry primers and paints that allow moisture vapor transmission.
When moving between paint types, oil to latex, for instance, use a bonding primer designed for that conversion. Manufacturers like Sherwin-Williams and Benjamin Moore publish product guides: Sherwin-Williams’ technical resources are helpful when selecting systems: https://www.sherwin-williams.com.
Ideal Environmental Conditions And Application Best Practices
Follow manufacturer temperature and humidity recommendations. Typically, you want moderate temperatures and low humidity: avoid painting when dew or rain is expected within 24 hours for exterior work. Thin coats dry more reliably than thick ones: apply multiple thin coats and allow full drying between them.
Use proper tools and techniques: quality brushes, rollers, or spray settings reduce the chance of application defects. Ventilate enclosed spaces to speed drying and remove solvents.
Repairing Bubbling And Peeling Paint: Step-By-Step
Repairing Small Localized Bubbles And Peels DIY
For small areas, start by scraping away loose paint back to a sound edge. Sand the feathered area to create a uniform profile, then clean the surface. If you see damp or efflorescence, address the moisture before proceeding. Apply an appropriate primer to the bare area, let it dry, and topcoat with matching paint.
When repainting a small patch, feather the new paint into the old so the transition is invisible. Use color-matched paint and thin, even coats.
Fixing Large Areas Severe Peeling Or Repainting Whole Walls
For large failures, remove all loose paint down to the substrate or to a tightly bonded layer. On plaster or drywall, you may need to re-skim or apply a leveling coat. For masonry, remove flaking material and consider applying a masonry cleaner and rinse. Prime the prepared surface with a compatible primer, then repaint with a suitable exterior or interior paint system.
If peeling covers extensive exterior walls, evaluate flashing, gutters, and roofline details for leaks before repainting.
Addressing Underlying Moisture Mold Or Efflorescence Before Repainting
If the root cause is moisture, fix it first. That could mean repairing flashing, replacing failing gutters, correcting grading, or repairing plumbing. Treat mold per health guidelines and remove efflorescence with proper cleaners and by addressing the water source.
Repainting over unresolved moisture will only cause recurrence. After repairs, allow materials to dry fully, sometimes weeks in winter, before priming and painting.
Special Situations And Materials
Exterior Walls And Weather Exposed Surfaces
Exterior paint has to handle sun, rain, wind, and thermal movement. Proper flashing, drip edges, and well-sealed joints are as important as the paint itself. Use exterior-grade primers and paints formulated for UV resistance and flexibility. On masonry, breathable paints prevent trapped moisture: on wood, choose coatings that allow the substrate to expand and contract without cracking.
When replacing siding or trim, coordinate paint systems across materials to avoid adhesion mismatches.
Bathrooms Kitchens And High Humidity Rooms
Rooms with consistent humidity need moisture management: exhaust fans vented outdoors, vapor-resistant primers, and mildew-resistant paints. Even with these measures, high-traffic shower walls should use tile or cement board rather than painted drywall. In kitchens, grease and steam require more frequent cleaning and possibly specialty primers that block stains.
Avoid painting in these spaces during humid seasons unless you can control ventilation and drying conditions.
Older Homes Plaster And Historic Finishes
Historic plaster and old lime-based paints behave differently than modern drywall and acrylics. If you’re working in an older home, test a small area and choose compatible primers and paints that won’t trap moisture or damage delicate finishes. In some cases, lime wash or breathable mineral paints are more appropriate than modern acrylics.
Consult preservation specialists when dealing with historic surfaces to maintain integrity and prevent long-term damage.
Cost Timeframe And Tools Needed For Repairs
Typical DIY Materials Tools And Estimated Time
Common materials: primers, patching compound, sandpaper, caulk, paint, and cleaning solutions. Tools include scrapers, putty knives, sanding blocks or a sander, brushes and rollers, a moisture meter if you have one, and personal protective equipment.
Time depends on the scope. Small localized repairs can be a weekend job: 1–2 days for prep and repairs, plus drying time and topcoating. Large jobs requiring moisture remediation or structural fixes may take weeks.
Here’s a simple comparison table to help you plan costs and time.
| Repair Type | Typical Materials | DIY Timeframe | Ballpark Cost (DIY) |
|---|---|---|---|
| Small patch (1–2 ft²) | Sandpaper, primer, paint | 1–2 days | $20–$75 |
| Medium area (10–50 ft²) | Patch, primer, 1–2 cans paint | 2–4 days | $75–$300 |
| Large area or wall | Primer, quality paint, tools | 3–7 days | $300–$1,200 |
| Moisture remediation | Flashing, gutter work, plumber | Weeks | $500–$5,000+ |
When Professional Repair Is Worthwhile Cost Considerations
Hire a professional when the problem stems from hidden leaks, structural movement, extensive mold, or when you lack time or tools for safe remediation. Pros bring experience diagnosing hard-to-find moisture paths, and they can coordinate multi-trade repairs like roofing, flashing, or plumbing.
Contractor costs vary widely by region, but paying for a proper fix often saves money versus repeated DIY touch-ups. For technical guidance on building envelope issues and standards, manufacturer technical data and building code resources help set expectations.
Frequently Asked Questions
Why does wall paint bubble and peel after a fresh paint job?
Wall paint bubbles and peels when adhesion is lost or the film is forced away from the substrate. Common causes include trapped moisture, poor surface prep (dirt or grease), incompatible paint/primer combinations, or application errors like too-thick coats or painting in the wrong temperature or humidity.
How can I tell if moisture is causing paint to bubble and peel?
Look for location clues: blisters under windows or peeling at wall bases often indicate leaks, rising damp, or condensation. Use a moisture meter for elevated readings, check for efflorescence on masonry, and note if failures appear after storms—these point to water intrusion rather than simple adhesion issues.
Can I repaint over bubbled or peeling wall paint without fixing the cause?
Repainting without addressing the root cause—especially moisture—only delays failure. You must remove loose paint, fix leaks or damp sources, let materials dry, prime with a compatible primer, then topcoat. Skipping repairs leads to recurrent bubbling and higher long-term costs.
What preventative steps stop wall paint from bubbling and peeling?
Prevent bubbling by ensuring a clean, dry, and sound surface: remove loose paint, clean grease, sand glossy areas, and use the correct primer for the substrate. Paint in recommended temperature/humidity, apply thin coats with proper drying time, and control ventilation in high-humidity rooms like bathrooms.
Could peeling paint indicate hazardous lead or mold, and when should I call a pro?
Peeling paint in older homes might contain lead; test before extensive sanding or removal. Chronic moisture often brings mold—call a certified remediator if mold is visible or widespread. Hire professionals for hidden leaks, structural movement, large-scale remediation, or suspected lead hazards.