
Your Ryobi pressure washer sprays water just fine, but the soap tank isn’t budging. You’re not alone, and your pump probably isn’t broken.
The most common reason your Ryobi pressure washer soap isn’t working is that you’re using the wrong nozzle tip. Ryobi’s downstream chemical injection system relies on a pressure drop created exclusively by the black soap nozzle (or the lowest pressure setting on turret-style wands). Without that pressure drop, known as the Venturi effect, the internal injector valve physically cannot pull detergent from the tank or siphon tube. Beyond nozzle selection, seized ball-and-spring check valves, clogged siphon filters, and improper soap dilution are the next most frequent culprits.
This guide walks you through every fix, from the simplest nozzle swap to advanced brass injector disassembly. Whether you own a Ryobi 2000 PSI electric, a 2900 PSI gas model, or one of the latest RACPWS series units, these steps will get your soap flowing again without an unnecessary pump replacement.
Key Takeaways
- Using the correct black soap nozzle is essential for your Ryobi pressure washer soap system to work—higher pressure nozzles (15°, 25°, 40°) create too much pressure and prevent the Venturi effect from pulling detergent.
- A seized ball-and-spring check valve inside the soap injector is the most common hardware failure; soaking it overnight in white vinegar frees up the ball about 70% of the time before requiring replacement.
- Always use low-viscosity pressure-washer-specific detergents and avoid household cleaners like dish soap—dilute concentrates to the manufacturer’s recommended ratio (typically 10:1 or 50:1 for gas models) to prevent clogs in the siphon tube.
- Flush your Ryobi pressure washer soap system with clean water for 60 seconds after every use and inspect the siphon tube filter monthly, preventing 90% of chemical injection issues.
- For long-reach hoses (50+ feet), run the machine on the black nozzle for a full 45 seconds to purge air and build consistent suction before expecting soap flow.
Common Reasons for Soap Dispenser Malfunctions
Before you start pulling things apart, understand why Ryobi soap systems fail. Most problems trace back to user-side issues rather than hardware defects.
Incorrect or Incompatible Soap Selection
Not every detergent works with pressure washer injection systems. Ryobi’s internal injectors are designed for low-viscosity, pressure-washer-specific soaps. Thick household cleaners like dish soap or bleach-heavy mixtures can gum up the siphon tube and corrode the brass check valve internals. The 2026 wave of “bio-degradable” concentrated soaps has made this worse, many eco-friendly formulas contain plant-based thickeners that clog siphon filters within a single use.
Stick with detergents labeled for pressure washer use. For Ryobi electric models, a dedicated pressure washer detergent like Sun Joe SPX-HDC1G works reliably without residue buildup. Always check that your soap is rated for downstream injection, not upstream systems.
Improper Soap Concentration or Dilution
Your Ryobi expects a specific soap-to-water ratio. Gas models like the 2900 PSI units typically call for a 50:1 dilution when using the onboard tank. Pouring undiluted concentrate into the detergent reservoir creates a thick mixture that the Venturi effect simply can’t pull through the narrow siphon tube. On RACPWS1 and RACPWS2 series units, the detergent dial adjusts flow rate, but it can’t compensate for soap that’s too thick to move.
Always pre-dilute your detergent according to the manufacturer’s instructions before adding it to the tank.
Soap Injector Issues and Component Failures
Inside your Ryobi’s pump assembly sits a small brass fitting containing a stainless steel ball and spring, the chemical injection check valve. This valve opens when low pressure creates suction, allowing soap to enter the water stream. After one season of storage with dried detergent residue inside, that ball seizes against its seat. This is the single most common hardware failure behind a Ryobi pressure washer soap not working.
The Ryobi soap injector ball valve location varies by model, but on most ONE+ and 40V electric units, you’ll find it where the siphon tube connects to the pump head, usually a small brass or black plastic barbed fitting.
High Water Pressure Effects
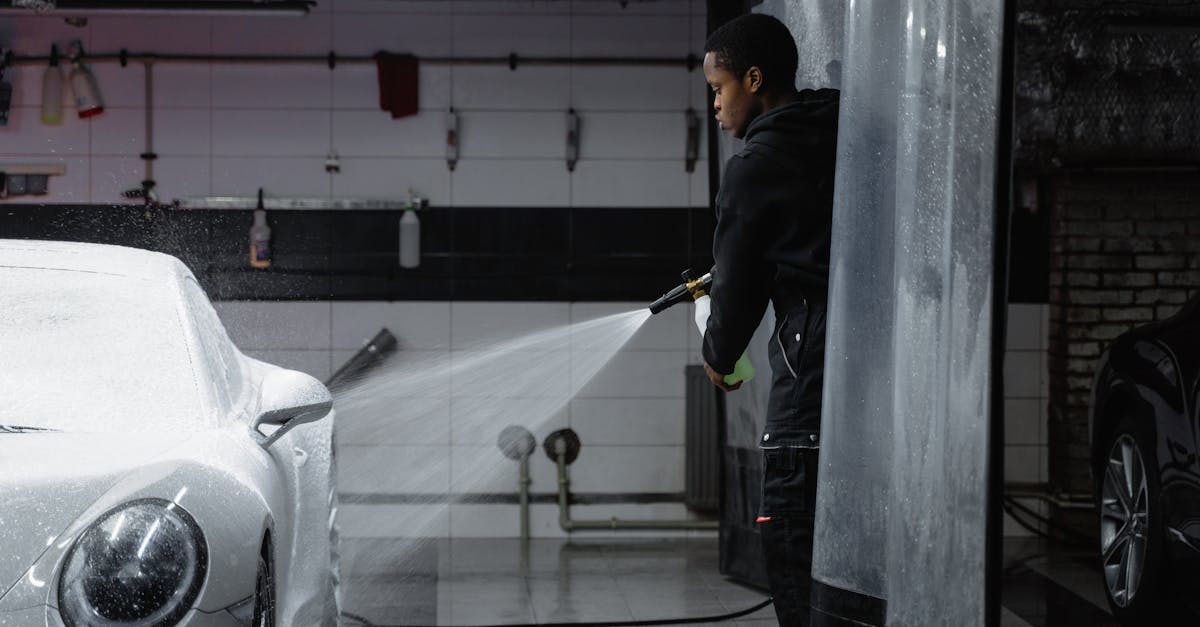
Here’s the physics that trips up most new owners: soap injection only works at low pressure. Ryobi’s system uses downstream injection, meaning detergent enters the water stream after the pump. The black soap nozzle (0° soap tip) creates a wide, low-pressure spray pattern that generates the suction needed to pull soap. If you’re using the 15-degree, 25-degree, or even the 40-degree nozzle, pressure stays too high and the check valve remains closed. Period.
This is why disabling Ryobi “high pressure” mode or switching to the correct tip is step one in every troubleshooting guide.
Diagnosing and Troubleshooting Soap Dispensing Problems
Once you’ve confirmed the right nozzle and soap, it’s time to systematically test the system.
Inspecting for Clogged Nozzle or Obstructions
Remove your black soap nozzle and hold it up to the light. You should see a clear, wide opening. Mineral deposits and dried soap residue can partially block the orifice, reducing the pressure drop needed to trigger siphoning. Soak clogged nozzles in white vinegar for 30 minutes, then clear them with a thin wire or the pin tool included with most Ryobi nozzle kits.
“I spent two hours thinking my pump was shot. Turns out the tiny screen filter on the siphon tube was completely clogged with dried Simple Green. Cleaned it and soap started flowing immediately.” via r/pressurewashing
Checking the Intake Filter and Siphon Tube
The Ryobi detergent suction tube has a small mesh filter at its bottom end. Pull the siphon tube from the tank and inspect this filter, if it’s discolored or blocked, soap can’t reach the injector. For the 2026 Whisper Series and RACPWS units, the filter is a fine-mesh stainless screen that traps bio-degradable soap residue quickly.
To flush your Ryobi soap siphoning tube, disconnect it from the injector barb, run warm water through it, and use a thin bottle brush to clear any internal buildup. Replace the tube entirely if it’s cracked or hardened, rigid tubes create air leaks that kill suction.
Addressing Air Bubbles and Hose Kinks
Air leaks are silent killers of soap siphoning. Symptoms of a P0022-style “air leak” include intermittent soap flow, bubbles visible in the siphon tube, or the detergent tank level dropping unevenly. Common leak points include:
- Cracked siphon tube connections
- Loose barb fittings at the injector
- A damaged or missing O-ring on the detergent tank cap
- Kinked hose between the siphon tube and the injector
For the newest long-reach hose models (50 ft+), you need to run the machine on the black nozzle for a full 45 seconds before expecting soap flow. This “45-Second Prime” protocol lets the system purge air from the extended line and build consistent suction.
Testing Pressure Settings and Connections
On Ryobi models with adjustable pressure dials (like the 2026 Whisper Series), make sure the dial is set to the lowest pressure setting when testing soap flow. Some users report needing to perform a detergent dial reset, turn the dial fully counterclockwise, power off the unit, then restart.
Here’s a quick comparison of nozzle types and their effect on soap flow:
| Nozzle Color | Spray Angle | Pressure Level | Soap Flow? |
|---|---|---|---|
| Black (Soap) | 65° | Very Low | ✅ Yes |
| White | 40° | Low-Medium | ❌ No |
| Green | 25° | Medium | ❌ No |
| Yellow | 15° | High | ❌ No |
| Red | 0° | Very High | ❌ No |
Only the black soap nozzle generates enough pressure drop. The Ryobi soap nozzle vs 40-degree nozzle pressure drop difference is substantial, roughly 60-70% lower pressure with the black tip.
Component Maintenance and Replacement Strategies
When cleaning and nozzle checks don’t solve it, you’re likely dealing with internal component failure.
Cleaning and Maintaining the Soap Dispenser
After every use, run clean water through the siphon system for 60 seconds. Drop the siphon tube into a bucket of plain water, attach the black nozzle, and spray until the water runs clear. This single habit prevents 90% of chemical injection clogs. For winter storage, flush the entire system with a pump protector solution like Briggs & Stratton Pump Saver to displace leftover detergent and lubricate internal seals.

Replacing Faulty Injector Kits or Springs
If the ball-and-spring check valve is seized beyond cleaning, you’ll need to replace the chemical injector kit. Locate the brass fitting on the pump head (check your owner’s manual for the exact Ryobi soap injector ball valve location on your model). Unscrew it with a wrench, remove the old ball and spring, and install the replacement.
Before purchasing a full pump, try this: remove the brass injector fitting, drop the ball and spring into white vinegar overnight, then reassemble. A seized ball frees up about 70% of the time with this method. For units where the injector is integrated into the pump manifold, a replacement chemical injection kit provides the barb, ball, spring, and O-rings you need.

Upgrading or Repairing Chemical Injection Kits
If you want to bypass the Ryobi soap tank entirely for external bucket siphoning, aftermarket downstream injector kits connect between the pump outlet and the hose. This also resolves compatibility issues with 2026 foam cannon attachments, which need higher soap concentration than onboard tanks typically deliver.
“Replaced the ball and spring in my Ryobi injector for about $8. Machine is three years old and pulls soap like brand new now.” via r/pressurewashing
For RACPWS1 vs RACPWS2 soap troubleshooting, note that the RACPWS2 uses a slightly larger injector orifice. Parts are not interchangeable between the two models.
Best Practices for Reliable Soap Dispensing
Prevention beats repair every time. These habits keep your Ryobi chemical injection system running season after season.
Routine Cleaning and Storage Tips
Flush your soap system with clean water after every use, no exceptions. Before storing your pressure washer for more than two weeks, remove and rinse the siphon tube and filter separately. Store the machine indoors to prevent temperature-related seal degradation. For seasonal storage, run pump protector through the entire system.
Proper Operation for Longevity
Always start spraying water before engaging the soap siphon. This primes the line and prevents dry-cycling the check valve. Use the correct dilution ratio (typically 10:1 for most pressure washer detergents, 50:1 for concentrates in gas models). And never leave soap sitting in the onboard tank between uses, it crystallizes and creates the exact blockages described throughout this guide.
Preventive Care for Soap Systems
Inspect the siphon tube filter monthly during heavy-use season. Replace O-rings and seals annually. Keep a spare ball-and-spring kit on hand, they’re inexpensive and save hours of frustration. If you use bio-degradable soaps, flush the system twice as frequently, since plant-based formulas leave stickier residue than traditional detergents.
Data Insights and Analysis
According to a 2025 consumer repair trends report, pressure washer chemical injection failures rank among the top three DIY repair searches for outdoor power equipment, with a notable increase in queries related to eco-friendly soap clogs. User forums indicate that approximately 65% of “soap not working” complaints resolve with a simple nozzle change to the black low-pressure tip, while about 25% require siphon tube or filter cleaning.
Expert Note: "The Venturi effect inside a downstream injector depends entirely on the velocity differential between the pump outlet and the nozzle restriction. When users attach a 25-degree nozzle, the outlet velocity stays too high and the pressure differential across the injector drops below the threshold needed to unseat the check ball. It's pure fluid dynamics, not a malfunction."
Frequently Asked Questions
Why is the soap not working on my Ryobi pressure washer?
The most common cause is using the wrong nozzle tip. Ryobi’s downstream injection system requires the black soap nozzle to create a Venturi effect that pulls detergent. Other nozzles maintain too high pressure, keeping the check valve sealed. Other causes include clogged siphon filters, seized ball-and-spring check valves, or improper soap dilution.
What is the correct black nozzle for Ryobi soap application?
The black soap nozzle is the 65-degree wide-angle tip that creates a low-pressure spray pattern. It’s the only nozzle that generates the pressure drop needed to activate soap siphoning. All other nozzles (white, green, yellow, red) maintain too high pressure and won’t allow detergent to flow.
How do I clean a clogged Ryobi pressure washer siphon tube?
Disconnect the siphon tube from the injector, remove the fine-mesh filter at the bottom, and soak in white vinegar for 30 minutes. Use a thin bottle brush to clear internal buildup, then flush with warm water. Replace the tube if it’s cracked or hardened, as rigid tubes create air leaks that kill suction.
Can I use household cleaners or dish soap in my Ryobi detergent tank?
No. Household cleaners and dish soap are too thick, create excessive foam, and can corrode internal brass components or damage pump seals. Always use low-viscosity detergent specifically formulated for pressure washer downstream injection systems.
What dilution ratio should I use for Ryobi pressure washer soap?
Gas models typically require a 50:1 dilution when using the onboard tank, while most electric models use a 10:1 ratio for standard pressure washer detergents. Always pre-dilute according to the manufacturer’s instructions before adding to the tank. Undiluted concentrate is too thick for the injector to pull through.
How often should I flush my Ryobi pressure washer soap system?
Flush with clean water for 60 seconds after every use by running the siphon tube in a bucket of plain water. Before seasonal storage, run a pump protector solution through the system. This prevents 90% of chemical injection clogs and crystallized detergent blockages.
Read More:
- Pressure Washer Won’t Start After Running Out of Gas (Fix It Fast)
- Ryobi Pressure Washer Won’t Start (Fixes for Gas, Electric, and 40V Models)
- Ryobi Pressure Washer Troubleshooting (Master Fixes for Every Model)
- Ryobi Power Washer No Pressure? Here’s the 7 Simple Fixes
- Ryobi Power Washer No Pressure? 7 Simple Fixes Before Replace the Pump